Posts

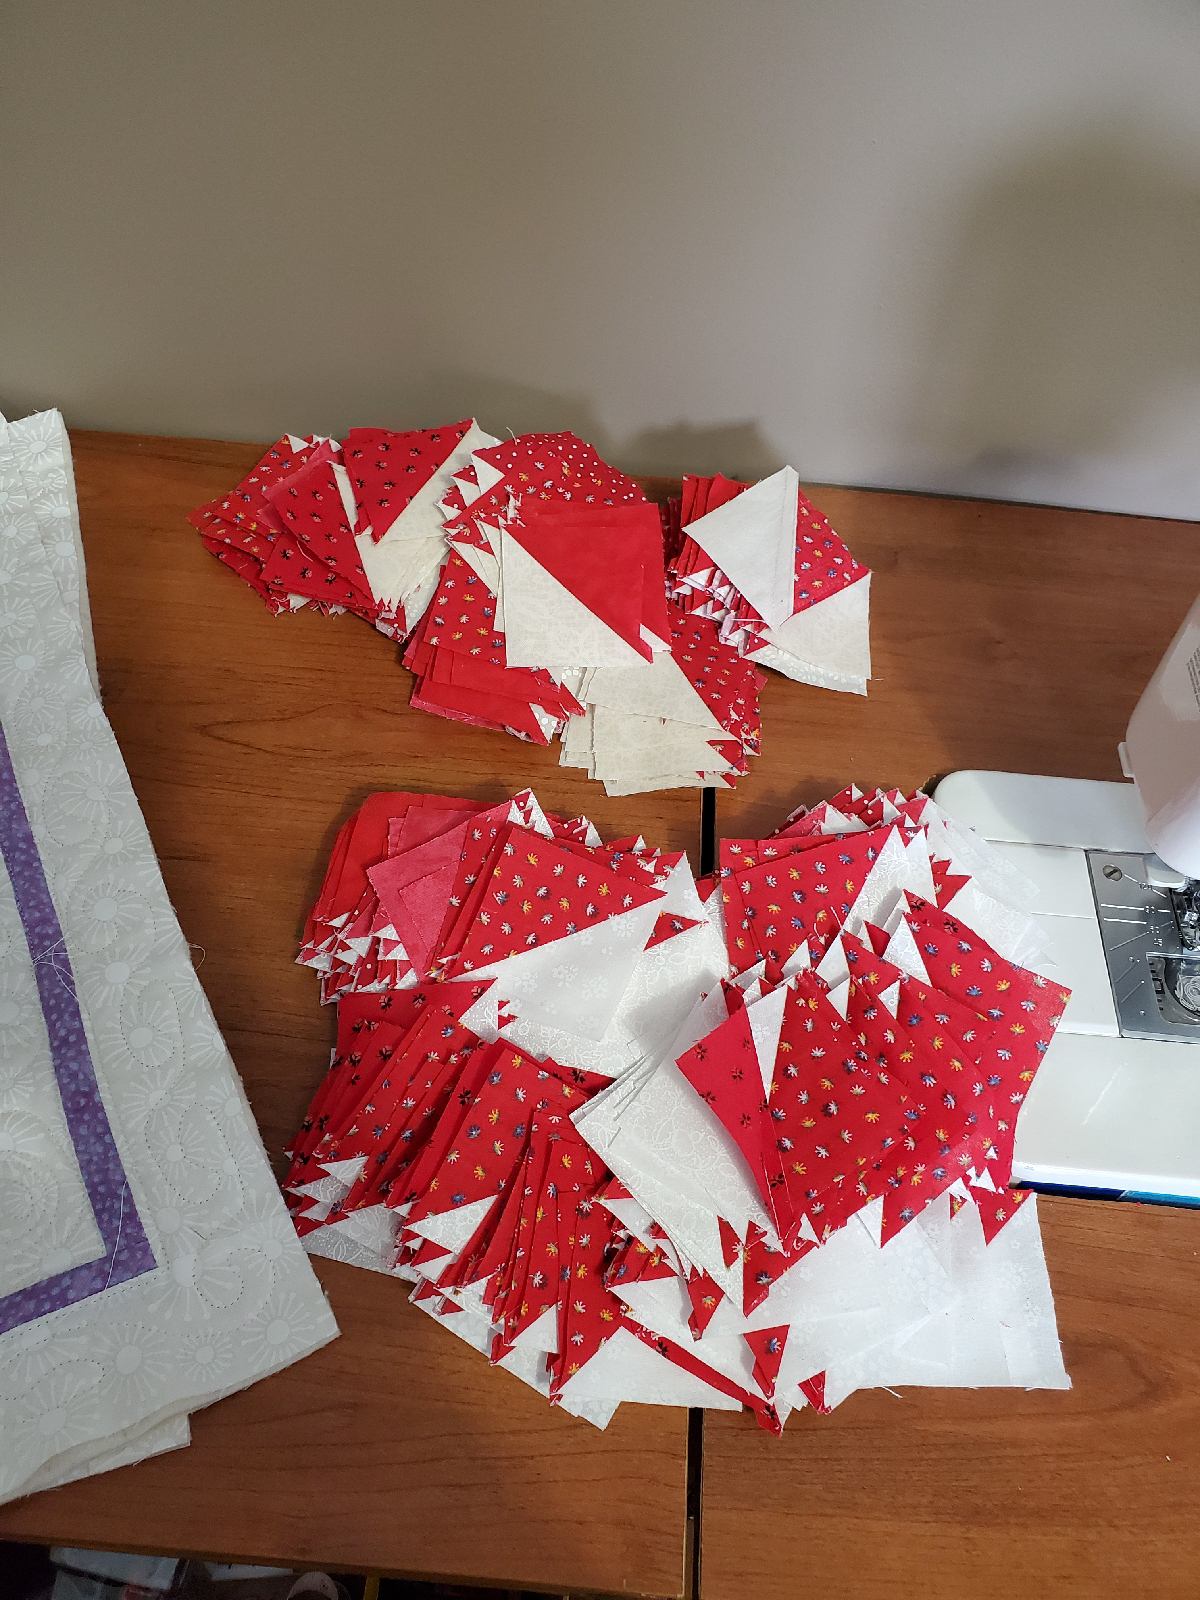
Canada Day Quilt...ready to quilt

Image
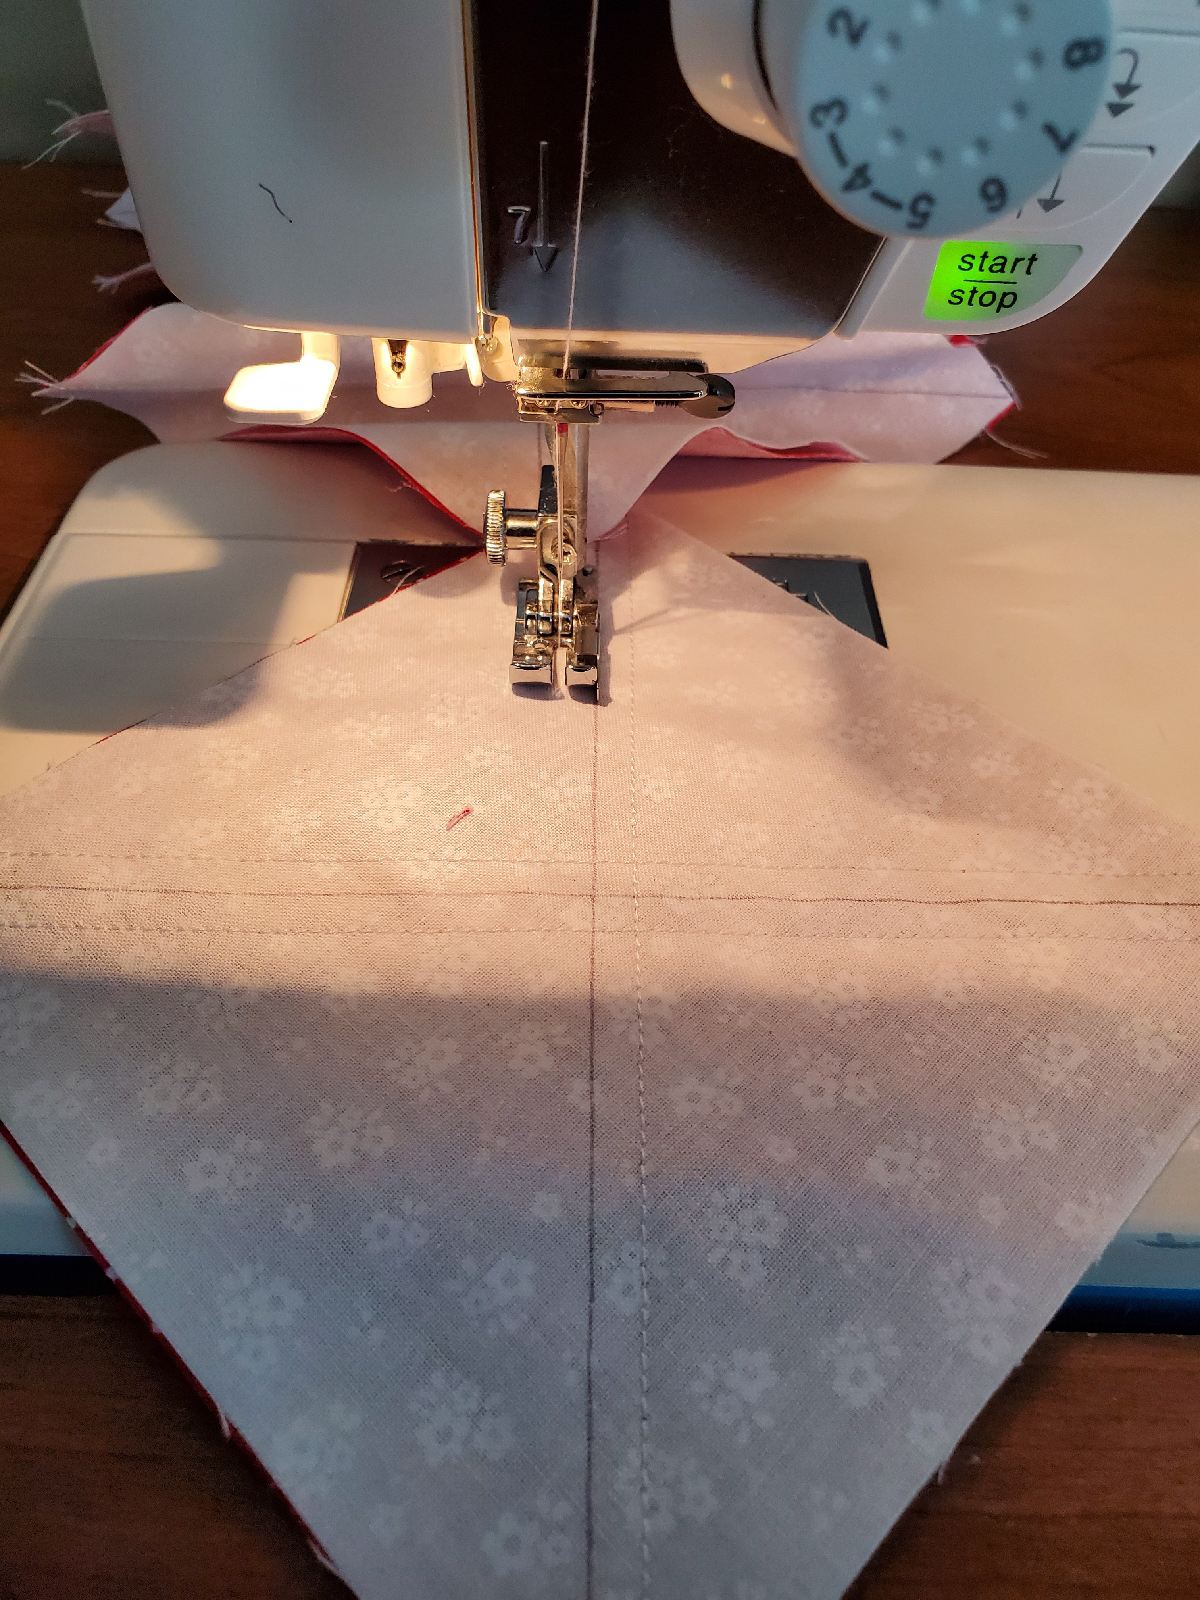
The first thing I discovered when making the outside border was that I didn't have enough half square triangles.  I guess I miscounted, so back to sewing and cutting and trimming I went! Then the sewing in pairs Then long strips, and then double strips.  No matter how careful, sometimes I end up with a section that is just a little longer than it's counterpart on the other strip. Always sew with the longer part on the bottom so the feed dogs will help. I like to sew so that I can see where my point is, as in the photo below, but that section was one of the ones which was too long. I flipped it over, sewed a 1/8th inch seam, and then flipped it over again to sew the quarter inch seam where I could carefully sew just above my point.   Then I measured the borders, they were all within a quarter inch of each other (I had 8 because of the 2 quilts), but the lengths of the 8 sides of the quilts were all different!  They were between 0.7

Canada Day Quilt Along...Tops are together!

Image
We are back home in the little red house by the sea. That also means back to other projects,  so the Canada Day Quilt has had to share my time!  But finally both tops are together! I got them out on the clothesline for a photo, but as you can see one of the pins came off quickly in the wind. After I took the quilts off the line I hung out a line of laundry. Hopefully it will stay on better than the quilt! Putting the tops together was pretty easy. I made my sashing in red and white/cream rather than just cream and white like my leaf blocks so that the sashing would show up better. The only issue is the orientation of the red and white/cream is opposite for vertical and horizontal.  So if you sew the strips with the bottom red on the right for the horizontal,  the bottom red will be on the left for the vertical.  I was sewing the strips on while making others as my leader/ender, so  thankfully I only had to rip out one set when I realized the problem.  One exampl

Canada Day Quilt...Making the maple leaf quadrants

Image
It has taken me a while to get to this point! I've been spending a lot of time with my granddaughters, and the weather has been so nice that instead of getting in a bit of sewing early morning and late afternoon,  I've been heading out for a walk.  But today it's snowing again :(. We're not supposed to get very much, but ...yuck! I started putting the quadrants together yesterday.  When I took the first one off the machine and looked I shook my head and asked myself if I had pinned with my eyes closed! After a few minutes with Jack the ripper I started over with a new approach.  I know I am more pleased with my seams and points if my seams nest, and they always nest best with the bottom seam pointing toward the needle.  A lot of the seams in the maple leaves just weren't playing nice when I started to put them together, so it was time to start moving seams the other way.  Of course some seams won't move because they are already sewn down under a seco

Canada Day Quilt...Making the Maple Leaves

Image
Hello from snowy St. John's, NL. Well March is definitely coming in like a lion...two snow storms in three days. As long as it goes out like the promised lamb I'm ok! There was an exciting development in my family this week. Our second granddaughter was born! We are in complete one household lock down here right now, but we had to care for granddaughter #1 during the days just before the birth and over the hospital stay, so we had to double bubble.  This is a blessing because it allows me to continue to help my daughter, and therefore get to have baby snuggles. Probably not today though! Even though our son-in-law is an essential worker,  he likely won't be working today,  which gives me a snow/sew day. I had finished the string pieced blocks,  so the next step was cutting some whites,  creams,  and a few reds for stem pieces.  If it looks like a lot of pieces,  don't panic! I'm actually making 2 quilts at one time. The next step is putting t

Canada Day Quilt...the start of string piecing

Image
If you have never string pieced before, get ready for some relaxing sewing! I started with a tub of red scraps along with the bits of fabric left from the half square triangles.  Bonnie Hunter gives some size suggestions for the paper foundations in the pattern.  I made mine slightly smaller because I didn't want to waste fabric! My guideline for string foundations has always been 1/8" bigger than the size you need to trim. If this is your first string piecing,  use Bonnie's guidelines.  Mine are 2 different sizes. Yours will all be the same size if you follow Bonnie's guidelines.  For the rectangles,  which are subcut from the larger pieces after the sewing,  you have to be careful that half tilt left and half tilt right. If you follow my paper cutting guidelines rather than Bonnie's,  your starting paper foundation is not actually a square. In order to insure that you get the tilting correct,  I suggest that

Canada Day Quilt Sew Along...The last of the half square triangles

Image
It seems like I have been trimming and pressing half square triangles forever! It's good to finally have them completed! I thought I had them all pressed and I found another stack...thankfully already trimmed! Edit** I'm sewing my borders together now and realize it would have been easier if I pressed the red and white HSTs to the red and the cream and red HSTs to the cream. Next time!! I generally store pieces in containers or bags until I need them so that nothing gets lost.  Here I'm using those great zipper bags that new sheets often come in. Off to the side you can see another project that is nearing completion.  It's for Easter so I had better stop the Canada Day Quilt for a while and make binding! After my Easter project is bound it will be on to string piecing using my reds. I am going to use up all my scraps first, and then cut some strips from yardage and fat quarters. I cut most of my strips between 1.25" a

Canada Day Sew A Long ...Half square triangles first!

Image
I'm not going to post the numbers or the sizes,  because that information is included in the pattern. Bonnie uses her Essential Triangle Tool to make half square triangles.  If you have it, use it! There will be no wastage and no trimming! I have this tool, but a friend has borrowed it, so I'm going to use the 8 at a time method, starting with 6 inch squares. I had a blog post last spring showing how to use that method.  Go to the link below.  http://www.littleredhousebythesea.com/2020/04/8-at-time-2-half-square-triangles.html When I did that tutorial I was enamored of my Bloc Loc for trimming half square triangles.  While I still love it, I think I might like my Clearly Perfect Slotted Trimmer better!  Here are some photos of my sewing and trimming and pressing.  It's still in progress! See you again tomorrow for more half square triangles! Happy Sewing!